Showing posts with label HTML5. Show all posts

Wednesday, August 14, 2019

How to create an asynchronic Javascript Promise

The Application Cache of HTML5

by carmel schvartzman
In this page we see how to create an asynchronic Javascript Promise. We use Jquery and HTML5.

How to create an asynchronic Javascript Promise


<!DOCTYPE html>
<html>
<head>
<script src="https://ajax.googleapis.com/ajax/libs/jquery/3.4.1/jquery.min.js"></script>
<script>
$(document).ready(function(){
  $("button").click(function(){
    
    //////  this line uses the Promise :
    fnPromise('Hello').then((url) => { console.warn(`DATA = ${url}`); },(e) => { alert('ERROR = ' + e); });
    
  });
});

 //////  this is the Promise :
const fnPromise = (url) => { 

return new Promise((resolve,reject) => {    
    if(url !== null) resolve(url);
        else reject('Bad request');
    }
    );
}

</script>
</head>
<body>
<button>Call a Promise and get the result back</button>
</body>
</html>


That’s all: enjoy HTML5!!!

עריכה: כרמל שוורצמן

Tuesday, January 5, 2016

The Application Cache of HTML5


The Application Cache of HTML5

by carmel schvartzman
The Application Cache in HTML5  allows us to make an offline version of a web page, releasing the load on our web server, and making the web pages a lot more responsives increasing performance.  That is because in this case the browser will only download changed web pages from the server.
This new HTML5 feature works by means of creating a cache manifest file,  a file of ”text/cache-manifest” MIME-type.


You should create MIME-types to allow web clients handle new file name extensions appropriately; elsewhere, if IIS does not recognize the file name extension, then sends the content as the default MIME type: Application, which means that clients cannot process the file.
So let’s add the cache-manifest MIME type to our web server. Type “inetmgr” in the RUN window:
The Application Cache of HTML5

After IIS opens, select the Default Web Site, and double-click “MIME Types”:
The Application Cache of HTML5

Click the “Add” link:

…  and type the “.appcache” file extension and its corresponding “text/cache-manifest” MIME type:

The Application Cache of HTML5

The Application Cache of HTML5


Now , lets use the Application Cache feature. First, let’s create a Manifest File with .appcache as extension. In this file will be three sections: CACHE MANIFEST( setting what should be cached),NETWORK(setting what should NOT BE CACHED) and FALLBACK (for fallback pages if a page is not accessible) . Therefore, type the “CACHE MANIFEST” section , in which we’ll list all the files that must be kept in cache:
The Application Cache of HTML5

Then, set which files should NOT BE CACHED, meaning that every request will be sent to the Web Server, using the “NETWORK” section:
The Application Cache of HTML5

Finally, add a FALLBACK section to estipulate which are the web pages in recovery state:
The Application Cache of HTML5


There is a ” # ” to open comments, and also there are used by the HTML5 browsers to decide whether the web page has been updated , to evict them from cache and reload them:
The Application Cache of HTML5

You can force the browser to renew the cached pages by changing the Manifest File of the application.
Finally, include the “manifest” attribute in the document’s  html  tag:


Important: different browsers can have different size limits for web cached data.

That’s all: enjoy HTML5!!!
עריכה: כרמל שוורצמן


Category: HTML5 WEB STORAGE

Sunday, December 27, 2015

Local Web Storage in HTML5


 by carmel schvartzman
[HTML5 Web storage is supported in IE 8+, Opera, Chrome, Firefox, and Safari]
In HTML5,  web pages can now store data in the user’s browser, instead of using cookies. Web Storage is more secure and faster.


Local Web Storage in HTML5


It is now possible to store large amounts of data in the client side,  affecting in a positive way the website’s performance.
The data is stored in a localStorage object, a  Collection structure based on key/value pairs,  stored as strings. We must convert them to the required format when needed.
  • Can a web page access data stored by another web page?    NO:  a page can only access data stored by itself.
There are two kinds of Web Storage in HTML5:   SESSION WEB STORAGE and LOCAL STORAGE.
The difference between them are related to the duration of storage:
  • 1-  SESSION STORAGE:     data is stored in client side until the session ends.
  • 2- LOCAL STORAGE:       data is stored in client side with no expiration date!!!!

The HTML5  Local Web Storage object stores the data not just for one session, but even when the user closes the browser window,  the data is persisted in the user’s local machine.

You can also use local storage in the browser, which is good even if the user closes the tab, the window or  the browser itself.
However, if you open another browser, the localStorage object will be initialized by itself, meaning that there will be now TWO localStorage objects in your machine, each one corresponding to each browser. If you are using Chrome and also IE, each one will have its ownlocalStorage object.
1.  To use the Local Web Storage HTML5 feature, add to your html page  a button containing a counter. We’ll see how the counter is stored permanently inside the user’s browser, beyond the web session:


2. Next, let’s add some css style to our page:
Local Web Storage in HTML5


3. Now create a script as a head child. Inside the script type the function you just linked to the onclick button’s event:


Local Web Storage in HTML5


The code check whether the Storage object has been initialized, meaning that the browser supports it.
<script>
function fnCounter() {
if (typeof (Storage) !== “undefined”) {
if (localStorage.counter) {
localStorage.counter = Number(localStorage.counter) + 1;
}
else {
localStorage.counter = 1;
}
document.getElementById(“counter”).innerHTML = “<H1>” + localStorage.counter + “</h1>”;
}
else {
document.getElementById(“counter”).value = “Your browser does not support HTML5″;
}
}
</script>
4. Nested beneath the “if” clause, build a “if then else” block to check whether the page has just loaded and the stored key/value must be initialized:


Local Web Storage in HTML5

Local Web Storage in HTML5


5. If so, just increment the counter value:


Local Web Storage in HTML5

Local Web Storage in HTML5


6. Now output the counter as the text button:
Local Web Storage in HTML5


7. Having finished to code, let’s test it:


Local Web Storage in HTML5


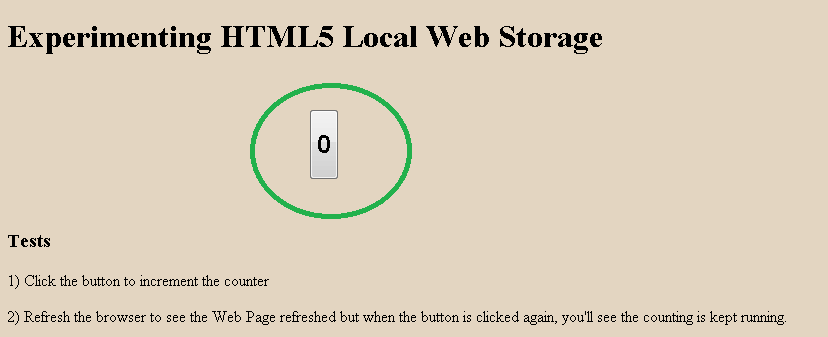
8. Load the web page. Click the button to increment the counter, and refresh the browser to see that the value has been persisted:

Local Web Storage in HTML5


9. Next, open another Browser Tab with the same URL, to check that the counter is kept running:  that’s because each session
SEES THE LOCAL Web Storage!!!


Local Web Storage in HTML5


10. Increment the counter by pulsing the button:


Local Web Storage in HTML5


Local Web Storage in HTML5


11. Close the browser, reopen it and you’ll see that the stored data has been KEPT AND PERSISTED and therefore the counter continues incrementing:

That’s all: enjoy HTML5!!!

עריכה: כרמל שוורצמן

Category: HTML5 WEB STORAGE

Friday, December 4, 2015

The GeoLocation in HTML5


The GeoLocation in HTML5by Carmel Schvartzman
[HTML5  Geolocation   is supported in IE 9+, Opera, Chrome, Firefox, and Safari]

The GeoLocation in HTML5


The Geolocation element is exposed via the navigator.geolocation object,  and used to get the geographical position of the user.
Because the Geolocation use can compromise user privacy, the user’s position is not available unless the user approves it.
In this tutorial, we’ll use the Google Maps API to load a map exposing the user’s location.

The GeoLocation in HTML5


To sample the Geolocation use, let’s build an HTM file including a DIV placeholder to the map representing the user’s location, and a button to trigger this function:
The GeoLocation in HTML5


Next, add some style to the page:

The GeoLocation in HTML5

Save and open in a browser:

The GeoLocation in HTML5

Now let’s code the function called by the button, inserting also an “if” clause that checks whether the browser supports GeoLocation:

The GeoLocation in HTML5

Now browse to the JavaScript API documentation to see the getCurrentPosition() function of the geolocation object:

The GeoLocation in HTML5

As you can see, the first parameter gets a function pointer to be used as a callback: we’ll name the callback function fnShowMap:

The GeoLocation in HTML5

Now let’s code the fnShowMap() function:

The GeoLocation in HTML5

The callback function gets back the “position” of the user, which includes latitude, longitude, altitude and accuracy:

The GeoLocation in HTML5


That’s why we can get back the latitude and longitude and use them.
Next, google the Google Maps API and find the example in it:

The GeoLocation in HTML5

Copy-paste it to our function and replace the latitude and longitude in the URL string:
The GeoLocation in HTML5


Finally, create an img tag and set its source as the URL of the static map:

The GeoLocation in HTML5

Refresh the page and press the button. The browser will try to block the geolocation because of privacy:

The GeoLocation in HTML5

Allow temporarily to track your position:


The GeoLocation in HTML5

And your position has been exposed on the Google Map:

The GeoLocation in HTML5

The GeoLocation in HTML5


That’s all: enjoy HTML5!!!
עריכה: כרמל שוורצמן

Category: HTML5 GEOLOCATION